In this guide, we will delve into the common reasons behind your dryer’s lack of warm air and the step-by-step troubleshooting process to help you resolve this issue. We will also discuss situations where it is better to call a professional Bosch dryer repair service.
Understanding the Frustration
- Laundry Day Dilemma: Laundry day is rarely a favorite, and when your dryer isn’t working correctly, it can become a dreaded task. Damp clothes, repeated drying cycles, and no warm air are all indications that something is amiss with your dryer.
Long-Term Consequences
- Financial Impact: It’s not just the immediate inconveniences; understanding the underlying causes is crucial for your finances.
- Costly Repairs: Swiftly addressing the issue can save you from costly repairs or the need for a replacement in the future.
- Appliance Longevity: Swift resolution ensures the longevity of your dryer.
The Importance of Swift Resolution
- Convenience: Resolving the issue means you won’t have to deal with the frustration of damp clothes and the inconvenience of multiple drying cycles.
- Savings: Quick action can save you from increased energy bills and costly repairs in the long run.
Common Causes of No Air in the Dryer
Understanding why your dryer isn’t producing warm air is the first step to resolving the issue. Here are the typical culprits:
- Overheating Issues: Dryers are designed with safety mechanisms to prevent overheating. When they detect excessively high temperatures, the dryer will automatically shut down to avoid any potential fire hazards.
- Blocked Ventilation: A crucial aspect of dryer operation is proper ventilation. If the vent system becomes blocked or clogged, it restricts the airflow, which can lead to overheating. Consequently, this can cause your dryer to shut off prematurely as a safety measure.
- Faulty Sensors: Modern dryers are equipped with advanced moisture and temperature sensors. These sensors play a crucial role in determining when your clothes are dry. If these sensors malfunction, they may inaccurately detect the moisture levels, leading to a premature shut-off.
- Excessive Lint Buildup: A common issue that affects dryer performance is an excessive accumulation of lint. This buildup not only reduces the efficiency of your dryer but can also trigger safety mechanisms, causing it to shut off unexpectedly. Ensuring that your lint filter and venting system are clear of obstructions is essential for uninterrupted drying cycles.
Step-by-Step Troubleshooting
Tools You’ll Need
Before diving into the troubleshooting process, gather the necessary tools to ensure an effective and safe diagnosis and repair. Here’s a list of essential tools to have on hand:
- Multimeter: A multimeter is crucial for testing electrical components and ensuring they are functioning correctly.
- Screwdrivers: You may need various types and sizes of screwdrivers to access different parts of the dryer.
- Lint Brush: A lint brush will help you clean lint and debris from various dryer components.
- Safety Gear: Prioritize safety by wearing gloves and safety glasses to protect against potential hazards.
To resolve the issue of your dryer not producing warm air, you can follow these step-by-step troubleshooting procedures:
Step 1: Check for Proper Ventilation
The first step in troubleshooting your dryer’s lack of warm air is to ensure that the venting system is clear of obstructions. This is essential for the proper flow of air and to prevent overheating issues that can lead to early shut-off.
- Remove the dryer from the power source to ensure safety.
- Check the vent hose and exterior vent for any blockages, such as lint or debris. Clear any obstructions found.
- Examine the venting system for kinks or damage. Replace or repair any damaged components.
- Reconnect the dryer to the power source and run a test cycle to check if warm air is now flowing correctly.
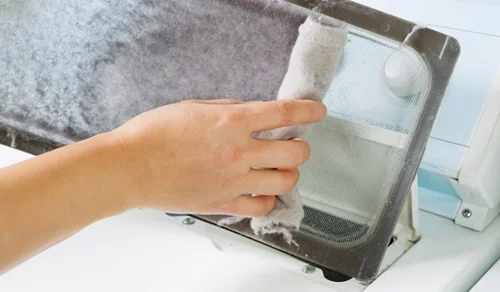
Step 2: Clean the Lint Filter
A clogged lint filter can lead to overheating and is a common cause of the lack of warm air. Cleaning it after every cycle is essential for maintaining optimal airflow.
- Turn off and unplug the dryer.
- Locate the lint filter, usually positioned within the door frame or on top of the dryer.
- Remove the lint filter and clean it thoroughly, removing all lint and debris.
- Check the filter housing for any remaining lint and clean it if necessary.
- Reinsert the lint filter, plug in the dryer, and run a test cycle.
Step 3: Inspect the Thermostat
The thermostat regulates the dryer’s temperature. Ensuring it functions correctly is crucial for warm air production.
- Turn off and unplug the dryer.
- Locate the thermostat, which is often near the heating element.
- Carefully detach the thermostat’s wires, ensuring you note their positions for reattachment.
- Test the thermostat with a multimeter to check for continuity. If it doesn’t have continuity, consider replacing it.
- Reconnect the wires to the thermostat and plug in the dryer.
- Run a test cycle to verify if warm air is being produced.
Step 4: Examine the Moisture Sensors
Moisture sensors are essential for detecting the moisture levels in your load accurately.
- Turn off and unplug the dryer.
- Locate the moisture sensors, typically near the lint filter or on the dryer drum.
- Inspect the sensors for any damage or dirt buildup.
- Clean the sensors to restore their accuracy.
- Reconnect the dryer and run a test cycle to see if warm air production has improved.
Step 5: Test the Heating Element
The heating element is responsible for generating warm air, and a defective one can cause overheating issues.
- Turn off and unplug the dryer.
- Locate the heating element, often found at the rear or within the dryer’s cabinet.
- Test the heating element’s continuity using a multimeter. If it doesn’t show continuity, replace it.
- Reconnect the dryer to the power source and run a test cycle to confirm if warm air is now being produced.
Step 6: Evaluate the Control Board
In some cases, issues with the control board can lead to problems with warm air production.
- Turn off and unplug the dryer.
- Inspect the control board for any visible signs of damage or malfunction.
- If any issues are noted, consider replacing the control board.
- Reconnect the dryer to the power source and run a test cycle to check if the warm air production has been resolved.
Seeking Professional Help
While many dryer issues can be resolved through basic troubleshooting and DIY repairs, there are situations where it becomes essential to seek the expertise of a professional appliance repair technician. Recognizing the right time to call in a professional can save you time, money, and prevent further damage to your dryer. Here are some instances when it’s advisable to seek professional help for more complex dryer issues:
- Electrical Problems: If the dryer’s electrical components, such as the wiring, control panel, or circuit board, are malfunctioning, it’s best to have a professional technician examine and repair these issues. Electrical work can be hazardous and requires the skills and knowledge of an expert.
- Gas Dryers: Gas dryers are more complex than their electric counterparts, and issues related to the gas supply, gas valve, or burner assembly should always be handled by a trained technician. Safety is a top priority when working with gas appliances.
- Compressor or Motor Failure: If the dryer’s motor or compressor is the source of the problem, it typically requires professional attention. Replacing these components can be a challenging task and may require specialized tools and expertise.
- Refrigerant Leaks: In the case of a heat pump dryer or a dryer with a refrigeration system, refrigerant leaks can lead to no air circulation. Repairing refrigerant leaks should be performed by a certified technician to ensure that the system remains efficient and environmentally friendly.
- Warranty Considerations: If your dryer is still under warranty, attempting DIY repairs may void the warranty. Professional technicians are trained to handle warranty-related issues while preserving your coverage.
- Safety Concerns: If you encounter any safety concerns, such as strange odors, unusual sounds, or electrical sparks, it’s crucial to turn off your dryer immediately and seek professional assistance. Safety should always be a top priority.
- Persistent Issues: When you’ve tried troubleshooting and attempted DIY repairs but the problem persists or worsens, it’s a clear sign that professional intervention is necessary. A qualified technician can diagnose and resolve complex issues that might not be apparent to the average homeowner.
- Lack of Experience: If you lack experience or confidence in your ability to diagnose and repair dryer issues, it’s better to leave it to the professionals from the beginning. Attempting complex repairs without the necessary knowledge and skills can lead to more significant problems and safety hazards.