A functioning freezer is a kitchen essential, helping you store perishables, frozen goods, and more. When it suddenly stops working, it can be a major inconvenience. However, before you panic or consider costly repairs, there are several steps you can take to troubleshoot and potentially fix the issue yourself. In this guide, we’ll walk you through the process of diagnosing and resolving common freezer problems. Additionaly we will discuss when it is better to call local bosch fridge repair
Common Freezer Issues
A well-functioning freezer is essential for preserving your food and preventing wastage. However, like any appliance, freezers can encounter various issues over time. Understanding and addressing these common problems can help keep your freezer running smoothly.
1. Temperature Fluctuations
Why Do Temperature Fluctuations Occur? Temperature fluctuations in your freezer can lead to thawing and refreezing of food, potentially compromising its quality. Several factors can contribute to this issue, such as:
- Overloading the Freezer: When you cram your freezer with too much food, air circulation is impeded, and the freezer may struggle to maintain a consistent temperature.
- Faulty Door Seal: A damaged or improperly sealed door can allow warm air to infiltrate the freezer, leading to temperature swings.
- Dirty Condenser Coils: Accumulated dust and debris on the condenser coils can inhibit heat dissipation, causing temperature imbalances.
- Thermostat Problems: A malfunctioning thermostat may not regulate the temperature effectively.
2. Ice Build-Up
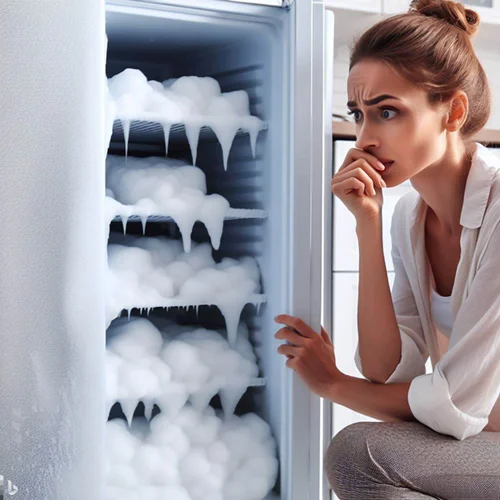
Why Does Ice Build Up in Your Freezer? Excessive frost or ice accumulation inside your freezer can be a common issue, leading to reduced storage space and potential cooling problems. The causes of ice build-up include:
- Frequent Door Opening: Each time you open the freezer door, warm, humid air enters, which can condense and freeze.
- Faulty Door Seal: As mentioned earlier, a damaged door seal can also result in ice build-up.
- Clogged Drain Line: If the drain line is blocked, it can lead to water accumulation, which freezes and forms ice.
- Thermostat or Defrost Timer Issues: Problems with the thermostat or defrost timer can prevent the freezer from defrosting as required.
3. Strange Noises
What Causes Strange Noises in Your Freezer? Unusual sounds emanating from your freezer can be concerning, but they often have identifiable causes. Common sources of strange noises include:
- Noisy Compressor: The compressor, responsible for cooling, can sometimes produce clicking, buzzing, or humming sounds.
- Evaporator Fan Issues: If the evaporator fan is out of balance or has obstructions, it may create loud noises.
- Ice Maker Troubles: A malfunctioning ice maker can generate strange sounds when it cycles to produce ice.
- Expansion and Contraction: Changes in temperature can cause the freezer’s materials to expand or contract, producing cracking or popping sounds.
4. Leaking Water
Why Is Your Freezer Leaking Water? Water leakage from your freezer can be problematic and cause damage to your kitchen floor or surrounding areas. Leaking water can be attributed to several factors, including:
- Blocked Drain Line: If the drain line becomes clogged with debris or ice, it can result in water overflow.
- Excessive Frost Build-Up: As discussed earlier, ice build-up can lead to water leakage when it melts.
- Defective Water Supply Line: If your freezer is equipped with a water dispenser or ice maker, a damaged water supply line can lead to leaks.
- Condensation: In some cases, condensation on the exterior of the freezer can result in water accumulation on the floor.
ensure that your frozen items remain in top condition. Regular maintenance and timely troubleshooting are key to keeping your freezer working efficiently.
DIY Troubleshooting
In this section, we’ll explore do-it-yourself troubleshooting steps to help you resolve common freezer issues without the need for professional assistance.
Cleaning the Condenser Coils
Why Clean Condenser Coils? Dirty condenser coils can significantly impact your freezer’s efficiency. When dust and debris accumulate on the coils, they insulate them, preventing efficient heat dissipation. This can lead to overheating and temperature fluctuations within the freezer.
How to Clean the Condenser Coils:
- Disconnect the Power: Always unplug your freezer from the electrical outlet to ensure your safety during maintenance.
- Locate the Coils: The location of the condenser coils can vary depending on your freezer’s make and model. They are typically found at the back or beneath the unit.
- Brush or Vacuum: Use a coil cleaning brush or a vacuum cleaner with a crevice tool attachment to gently remove the accumulated dust and debris. Ensure thorough cleaning.
- Reconnect and Test: After cleaning, plug your freezer back in, and monitor it to see if the temperature stabilizes.
1. Defrosting Your Freezer
Why Defrost Your Freezer? A frosty buildup inside the freezer can lead to cooling issues and reduced storage space. Regular defrosting can improve your freezer’s performance and energy efficiency.
How to Defrost Your Freezer:
- Empty the Freezer: Remove all items from the freezer and place them in a separate freezer or insulated coolers to prevent thawing.
- Turn off or Unplug: Disconnect power to the freezer to stop the cooling process.
- Let It Thaw: Allow the ice to melt naturally, which may take a few hours. Placing towels or containers to catch dripping water can help.
- Clean and Dry: Once the ice has melted, clean the interior with a mild solution of water and baking soda. Dry it thoroughly.
- Restart the Freezer: Plug it back in, wait for it to reach the desired temperature, and return your food items.
2. Checking the Evaporator Fan
The Importance of the Evaporator Fan: The evaporator fan is responsible for circulating cold air within your freezer. If it’s not functioning correctly, you may experience temperature fluctuations.
How to Check the Evaporator Fan:
- Unplug the Freezer: Ensure the freezer is not connected to power before beginning the inspection.
- Access the Evaporator Fan: Locate the evaporator fan within your freezer. This is typically found in the freezer’s rear or behind an access panel.
- Inspect the Blades: Visually inspect the fan blades for any visible damage, obstructions, or ice buildup. Clear any debris or ice if present.
- Spin the Fan: Gently spin the fan blades by hand. They should rotate freely. If they’re stiff or not spinning, the fan may need to be replaced.
3. Inspecting the Start Relay
Understanding the Start Relay: The start relay is a critical component that helps the compressor start. If it’s faulty, the compressor may not function properly, affecting the freezer’s cooling ability.
How to Inspect the Start Relay:
- Unplug the Freezer: Disconnect the freezer from the power source to ensure safety during the inspection.
- Locate the Start Relay: The start relay is usually located on the compressor or nearby. It’s a small, rectangular or square component.
- Remove the Relay: Carefully detach the start relay from the compressor. It may have wires connected to it.
- Check for Damage: Examine the relay for visible damage, such as burnt or melted components. If you detect damage, it should be replaced.
- Test with a Multimeter: If no damage is visible, use a multimeter to test the continuity of the relay’s terminals. A lack of continuity indicates a faulty relay.
Advanced Troubleshooting
In some cases, the issues with your freezer may require more advanced troubleshooting and potentially professional assistance. Here, we’ll delve into these advanced techniques.
1. Refrigerant Leak Detection
Why Is Refrigerant Leak Detection Important? A refrigerant leak is a severe issue that can affect your freezer’s cooling capacity. Detecting and addressing leaks is crucial for efficient operation.
How to Detect and Address Refrigerant Leaks:
- Safety First: Ensure safety by wearing appropriate protective gear and ventilating the area.
- Locate the Leak: Use a refrigerant leak detector or soap solution to identify the leak’s location.
- Repair or Replace: Once the leak is located, consult a professional technician to repair or replace the damaged component. Refrigerant handling should be left to experts.
2. Compressor Testing
Understanding Compressor Testing: The compressor is the heart of your freezer’s cooling system. If it’s not functioning correctly, your freezer won’t cool effectively. Testing the compressor can help identify issues.
How to Test the Compressor:
- Unplug the Freezer: Disconnect the freezer from the power source.
- Access the Compressor: Locate the compressor, usually at the rear of the freezer or underneath.
- Check Electrical Connections: Inspect the electrical connections to the compressor for any loose or damaged wires.
- Compressor Relay Test: Use a multimeter to test the compressor relay for continuity. If it fails the test, it may need replacement.
- Check for Power: With the multimeter, verify that the compressor is receiving power when the freezer is turned on. If it’s not, further electrical troubleshooting may be necessary.
3. Replacing Defective Parts
Why Replace Defective Parts? If you’ve identified specific components within your freezer as the source of the problem, you may need to replace them to restore your freezer’s functionality.
How to Safely Replace Defective Parts:
- Unplug the Freezer: Always disconnect your freezer from the power source before starting any replacement procedures.
- Identify the Defective Part: Based on your troubleshooting, identify the specific part that needs replacement.
- Gather Replacement Parts: Obtain the correct replacement part, either through the freezer’s manufacturer or a trusted appliance parts supplier.
- Follow Manufacturer’s Instructions: Refer to your freezer’s manual or follow online tutorials for step-by-step guidance on replacing the part.
- Test After Replacement: Once the replacement is complete, plug in the freezer, and monitor its performance to ensure the issue is resolved.